Install a New Hard Drive |
Previous |
Last Updated: December 12, 2008
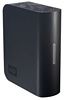 |
External 3.5 Inch Hard DriveInstalling an external hard drive with a USB 2.0 or Firewire cable is quite simple. Plug the power supply to the electrical outlet and to the external hard drive. Connect the USB or Firewire cable to the computer and to the external hard drive. Windows will automatically assign it a new drive letter. There aren't any drivers to install. As an option, the drive can be assigned a different drive letter. To format a hard drive, open My Computer or Windows Explorer. Right click on the drive letter and choose "format" from the shortcut menu and click OK. That's it. You're done. External drives with an eSATA cable may require the computer be turned off before plugging in the eSATA cable. Otherwise, the computer won't recognize the drive. It's not as hot swappable as USB and Firewire are. |
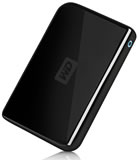 |
External 2.5 Inch Hard DriveThe steps are the same as above except there may not be a power cord. The drive gets all of the power from the USB or Firewire data cable. Make sure the USB or Firewire cable is plugged into the desktop or notebook computer and not through an external hub. There typically isn't enough electrical power in the hubs to run a hard drive. |
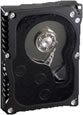 |
Internal 3.5 Inch Desktop Hard DriveThere are a lot of options here. First is the physical installation. Make sure there is a spare drive bay to hold the hard drive, a spare power connector, and a spare data cable. Open the computer case to find out. Second is getting Windows, Linux or Mac to recognize the drive. I'm going to suggest using Google to search for "install hard drive" and refine your search from there. There are too many variables for me to cover them all. However, see the tips below. |
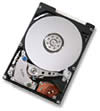 |
Internal 2.5 Inch Notebook Hard DriveSearch the technical support section of the notebook computer manufacturer's website to see if they offer step by step instructions. The next option is to use Google to search for "install laptop hard drive." |
Hard Drive Partitioning Software
Easeus Partition Manager 3 is free and the most downloaded partitioning software. It's an alternative to purchasing Partition Magic.
My Most Recent Installs
August 2008 - Replace the D: drive on the desktop: I had a C:, D: and E: hard drive and the D: drive was 95% full of photos. I added a 1TB drive to the desktop computer case and rebooted. A lot of text appears on the screen before the Windows logo appears and I saw it recognized the fourth SATA drive. That's a good sign. I opened Windows Explorer and saw the F: drive was not there. I opened Computer Management (Windows XP: Start, Programs, Administrative Tools, Computer Management) and then clicked on Disk Management. I maximized the window to the full screen and saw the drive. I could have partitioned and formatted the drive there, but I preferred to use Norton Partition Magic. The drive must have been preformatted because it took about 2 minutes to complete instead of several hours. If you don't have Administrative Tools, click on Start, Settings, Taskbar and Start Menu, Start Menu tab, Customize button, show System Administrative Tools.
April 2008 - Made a 1TB, eSATA, external hard drive for the desktop: I read eSATA external hard drives run just as fast as internal hard drives, which is about 4 times faster than a USB external hard drive. That turned out to be true for me. I purchased a bare (OEM), 3.5 inch, 1TB SATA drive from NewEgg.com. I also purchases a Rosewill external hard drive enclosure that included a eSATA and USB connection. It also included an adapter to make an internal SATA port into an external eSATA port by using an empty PCI slot. Newer, higher end motherboards have a built in eSATA port and don't need to install the adapter. I used a Phillips head screwdriver to remove the screws on the enclosure so that the top could come off. I connected the bare drive to the circuit board connection of the enclosure, put the top back on, and screwed in the screws. I turned off the computer, plugged in the power brick for the external drive, connected the power to the external drive, connected the SATA cable that came with the enclosure to the computer and the enclosure, turned on the external hard drive, and booted up the computer. I always have to turn off the computer, turn on the eSATA external hard drive, turn on the computer, make a backup, turn off the computer, turn off the external hard drive, and turn the computer back on. It turns out eSATA is not as plug and play friendly as USB or firewire is. After Windows was done loading, I opened Partition Magic, created a partition that is automatically configured to be the same size as the drive, and formatted it. It was not preformatted, so it took a few hours to go through the formatting stage. I went to bed and it was done by morning.
February 2008 - Replace the C: drive on the laptop: I needed more capacity, so I purchased a bare 250GB drive, an external 2.5 inch drive enclosure, and downloaded a trial copy of Acronis True Image. I used a small, Phillips head screwdriver to assemble the new drive and external enclosure. I made sure Windows could recognize the drive before attempting to clone it. I plugged in the USB cable, Windows recognized the drive as the E: drive, but an error message said there wasn't any data on it which meant it needed to be formatted. I used Partition Magic to add a partition equal to the size of the hard drive, assign it as a logical partition (needed for IDE/ATA drives, but not SATA drives), and formatted it. It took a few hours to format. :-( Once I could plug in the USB cable to the drive and click on the icon in the system tray to "safely remove hardware" without getting error messages, I felt comfortable enough to continue. I used the "clone hard drive" option in True Image and followed the directions. The computer rebooted to a blue, text installation screen to clone the drive and rebooted. The instructions said I should turn off the laptop, swap the drives, and reboot. I did and everything worked.
September 2007 - Added a 320GB drive to the desktop: I turned off the computer, opened the case, removed the empty drive bay tray, screwed the hard drive to the drive tray, plugged in the red SATA cable and power connector, slide the tray into the desktop case, put the side of the case back on, and booted up the computer. A lot of text appears on the screen before the Windows logo appears and I saw it recognized the third SATA drive. That's a good sign. I opened Partition Magic, created a partition that is automatically configured to be the same size as the drive, and formatted it. It was already preformatted, so Partition Magic chose the Quick Format option automatically and finished within a minute. Full drive formats can take hours. I rebooted just to make sure recognized the drive as the E: drive. I was then able to start copying some of the files and folders from the D: drive to the E: drive.
Tips for Installing Internal 3.5 Inch Desktop Hard Drives
- PCI or PCIe x1 SATA add-on cards start at $25 if you need more SATA ports.
- If your one, physical hard drive is partitioned into a C: and D: drive, then the second drive may become the new D: drive and the old D: drive will change to the E: drive. That's one reason why I don't partition my hard drives. Use Google to see if the new drive can be the E: drive.
- Typically, newer drives are faster than older drives.
- Making the new drive the D: drive is fairly easy.
- Cloning the C: drive to the new drive takes longer and won't give you the speed boost you think it will.
- Seagate's DiscWizard and Western Digital's Data Lifeguard Tools are free hard drive copying software, but it only works on their brand of hard drive. The original hard drive can be made by any manufacturer, but the new C: drive has to be made by Seagate or Western Digital.
- Use an antistatic wrist strap so you dont accidentally fry the inside of your computer.