Photoshop - Simple Stuff |
Last Updated: July 7, 2007
This page was thrown together as a quick guide to get someone started in Photoshop or Photoshop Elements. Please play around with the highlighted items to see what they do.
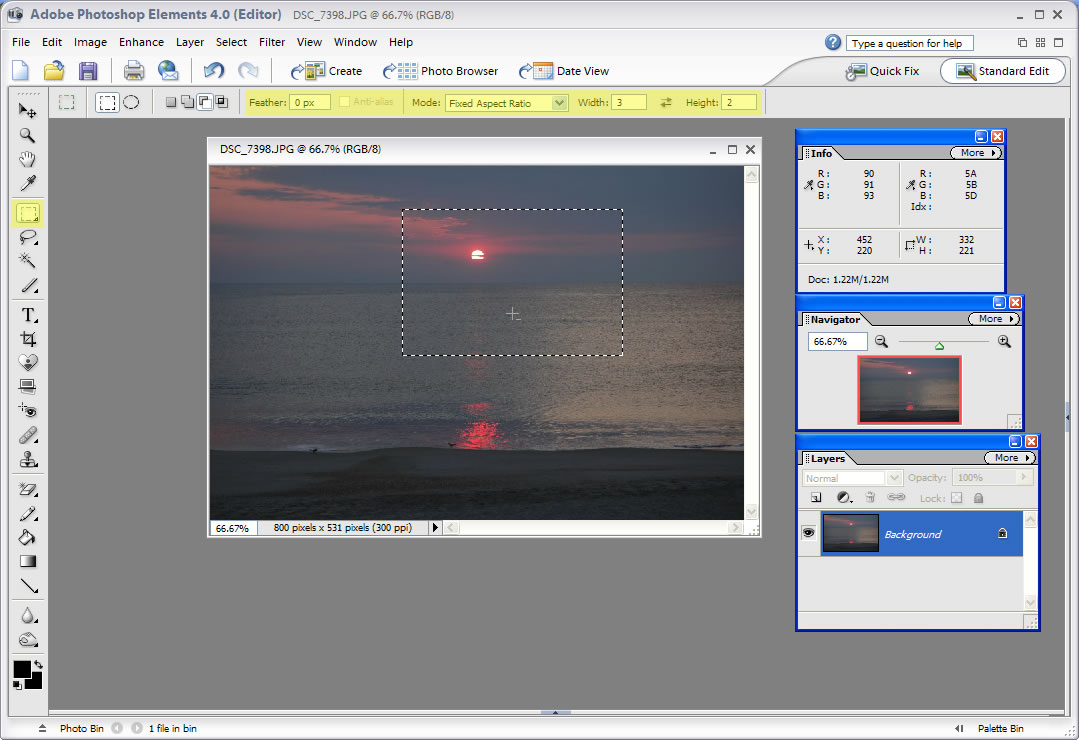
Cropping Photos Using the Same Width and Height Ratio
Point and shoot cameras take pictures that have a 3:4 ratio of height:width. SLR cameras have a 2:3 ratio. I'd recommend keeping the photos in one of the ratios. It looks better when the pictures are displayed side by side in a web page or photo book. If you're spending $60 on a photobook from Shutterfly, then I'd recommend choosing the one ratio for all photos no matter what the original ratio was. This is especially true if multiple cameras were used on one trip and all of the photos are being pooled together to choose the best ones for the photo book. In the end, the tops and bottoms of the photos will appear in a straight line on the page instead of a bumpy line.
Click on the picture. Drag the box to an opposite corner. It's weird to draw a box when the Fixed Aspect Ratio is turned on. After the box is drawn, click INSIDE the box to click and drag it. Click OUTSIDE the box to remove it. What if you want to make the box larger or smaller? Photoshop ($600) will allow you to adjust the size of the box without starting over. Photoshop Elements makes you start over and redraw the box.
The Feather feature makes fuzzy edges, so make sure it's set to 0px for sharp edges.
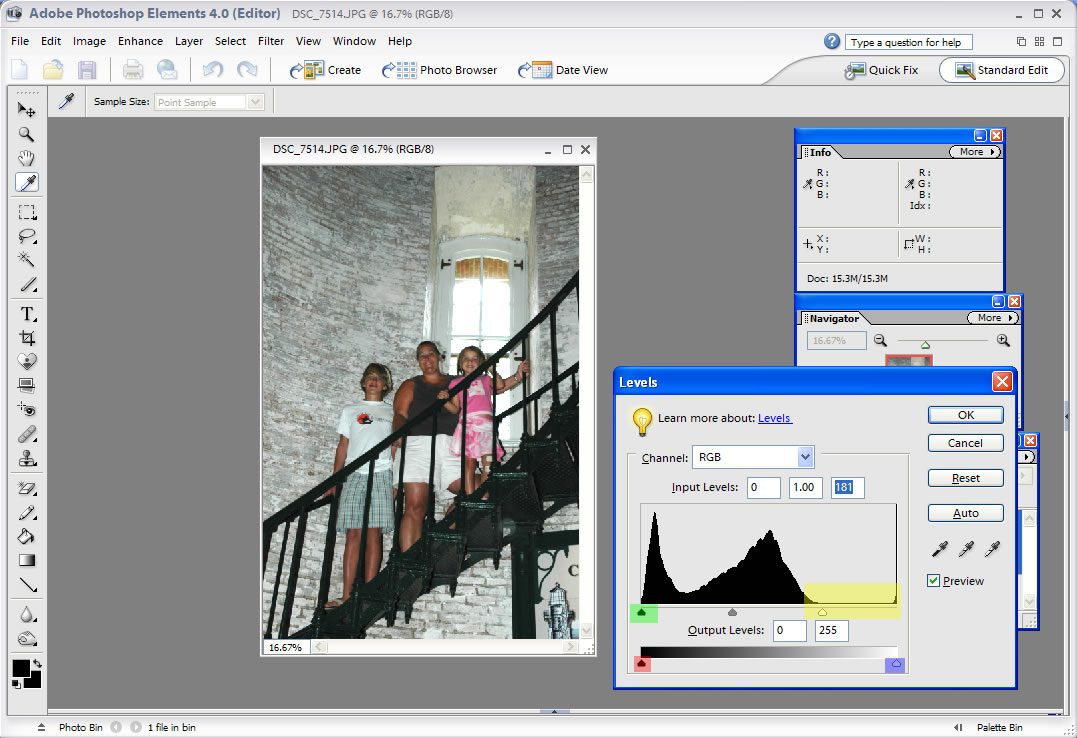
Lightening or Darkening Photos with Levels
I like to lighten or darken photos with the Levels feature in Photoshop instead of anything that is offered in the menu. I have more control and I can usually get better results. The professional version of Photoshop ($600) has more options than the Elements version, so I'll stick with Photoshop Elements. I use the CTRL + L key combination to make the dialog box appear.
The histogram shows a wealth of information. The green highlighted arrow is on the black end of the spectrum while the yellow highlighted arrow is on the white end. The mountains show how much of a color is present. Ideally, I want a picture that has peaks and valleys from the far left (black) to the far right (white). This photo is dark as shown by the lack of peaks and valleys on the right side of the histogram. It is missing the whites and lighter colors. To lighten the photo, I clicked and dragged the yellow highlighted arrow to the right side of the histogram. This brightened the image without distorting the colors too much. The resulting photo looks more natural than other most other options on the menu. The red arrow shows how black is black and the blue arrow shows how white is white. If you want to lighten the dark colors, then click and drag this arrow closer to the center of the bar. Likewise, if you want to darken a bright photo, click and drag the blue arrow toward the center of the bar.
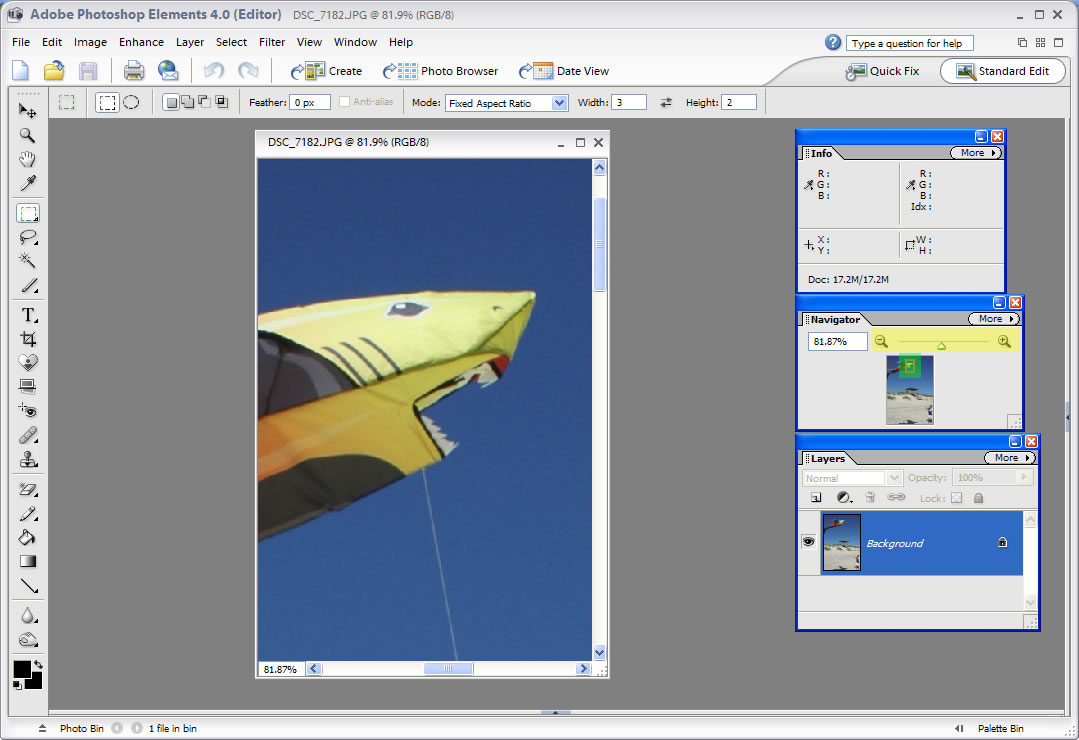
Navigator
The Navigator is a quick and easy way to zoom in and out and move around the photo. On the navigator toolbar, click and drag the arrow from left to right to increase the magnification of the photo. Notice the size of the red box below this arrow will shrink. What you see in the big photo on the left is what's inside the red box on the navigator toolbar. To move to a different part of the photo, click and drag the red box.